


For me, pot holders are a great way to practice different patterns, stitches or motifs. I like experimenting with small items to avoid investing a lot of time and money into a big project that I may end up hating and maybe not even want to finish after I started it. Loosly described, I view some of my potholders as ACEOs or ATCs, little sampler of my crocheted work.
With that in mind, I decided to tackle the Polish Star design that I've always wanted to try. I think it turned out ok!


This pot holder is super thick because there's a front and a backside. Also it's made from 100% worsted weight cotton that is an excellent heat insulator.
For those of you that are interested in crocheting the Polish Star, I am providing the link to this pattern and some other helpful information.
The pattern itself is from FreePatterns.com and registration is free! All you need is an e-mail address. It's a totally safe site. I get patterns from there all the time. They have some really pretty ones, so click below:
Free Patterns (look for Polish Star Pot Holder) you'll probably have to register first before downloading the PDF file, but it's worth it. Like I said, they have really cute patterns.
Also, here's a You Tube video clip to show the weaving process for the loops of the Polish Star. I found the video AFTER I assembled the star, but I thought I'd include it for you anyway.
Polish Star Weaving
What helped me most for the weaving process is looking at the PDF file's picture of the completed project and the diagram the directions provided, plus re-rearding the instructions over and over until it finally sunk in.
Now that I know how to do it, the next one will be a lot easier. (I'm working on a red and white one now.) It was a nice change and a fun little challenge for me. That's why I like making different things, just to keep my brain activated ;-)
I took some photos of my work in progress, so you can compare and not worry if it's supposed to look like this, because it starts out kind of unusual (at least for me.)
 This is rows 1 through 3 - see how it looks like you're going to make a circle, but it'll be a square potholder. It only looks deceiving because of the big loops in between.
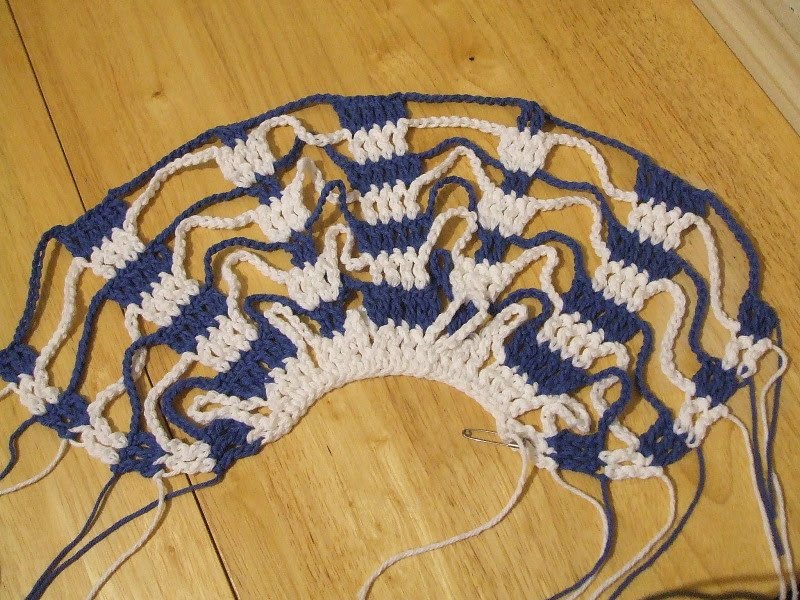 This photo is my work through rows 8
 This is right at the beginning of the actual weaving process (refer to You Tube video and pattern explanation.)
After the weaving is completed, then there is the back part that has to be crocheted. The instructions stated I was to use blue, but my blue cotton wasn't quite as thick as the white and it would not have matched up nicely without me having to make stitch adjustments, so I simply used white and I am very pleased with my first try. Let me tell you, that is one thick and soft pot holder to keep your fingers protected from a burn.

I'm offering this pot holder for sale in my Etsy shop and, as always, my dear blogging buddies/followers get a 10% discount! Hope you all had a very nice Memorial Day weekend!
Please bear with me, I'll be going outside pretty soon so that I can post more nature photos and such. I've just been keeping cool indoors and avoiding the bugs and therefore have been crocheting more. (I know, poor Gizzy!)


0 comments:
Post a Comment